Thursday, June 13, 2013

Summer Wardrobe Plans

Hey everybody! I'm getting ready to send out the patterns to the giveaway winners but I got distracted by seeing summer sewing plans on other blogs. Typical ADD kicking in for me. lol The weather here in Maryland has been increasingly summer-like and I'm realizing that my wardrobe is not well suited for the weather. I need to make a plan for things I need to carry me through the next 3 months or so.

Here's what I'm starting with in my wardrobe already:
Lots of tops and tanks
4 cotton cardigans
3 cotton shorts that don't fit well
1 cotton blend capri pants that are a little snug
2 bathing suits that don't fit
Lots of skirts
Lots of dresses
2 bras that fit perfectly
1 pair of sandals
1 pair of flats
1 pair of sneakers that need replaced
2 pairs of dress shoes

So, considering the above I already see the plan I need to make. I will be attempting to make some bottoms as I love shorts and capris in summer. It gets pretty hot here, especially in late June through July. Less is more, for sure, during that time of year. Also, the pool at my mother in-law's is open and I haven't gone swimming yet because my suit doesn't fit! That's just a crime! I need to make a bathing suit right NOW! I also need some shoes. After I broke my foot last August I haven't been able to wear shoes with flexible soles unless I can put carbon fiber plates under the insoles. I need to figure out what exactly I want and go from there with figuring out what I can find that in to work for my feet. I also need to buy a couple more bras. I finally found one that fits me like it was custom made for me: the Panache Tango II Plunge. I figure buying one a month until I have enough would be good considering my budget.

My tentative sewing plans:
For the shorts and capris I will probably use Simplicity 3435 from the early 1960s. If I use the pattern I will be using views 1 and 3. I have some stretch cotton twill in navy and olive. The navy I have enough for the capris and maybe shorts. The olive I have enough for shorts. I'd like to get some khaki stretch poplin for the bottoms as well. The pair of capris I have are the perfect length for me. I'll be using them with the pattern to make sure the ones I make hit me where I like on my legs.

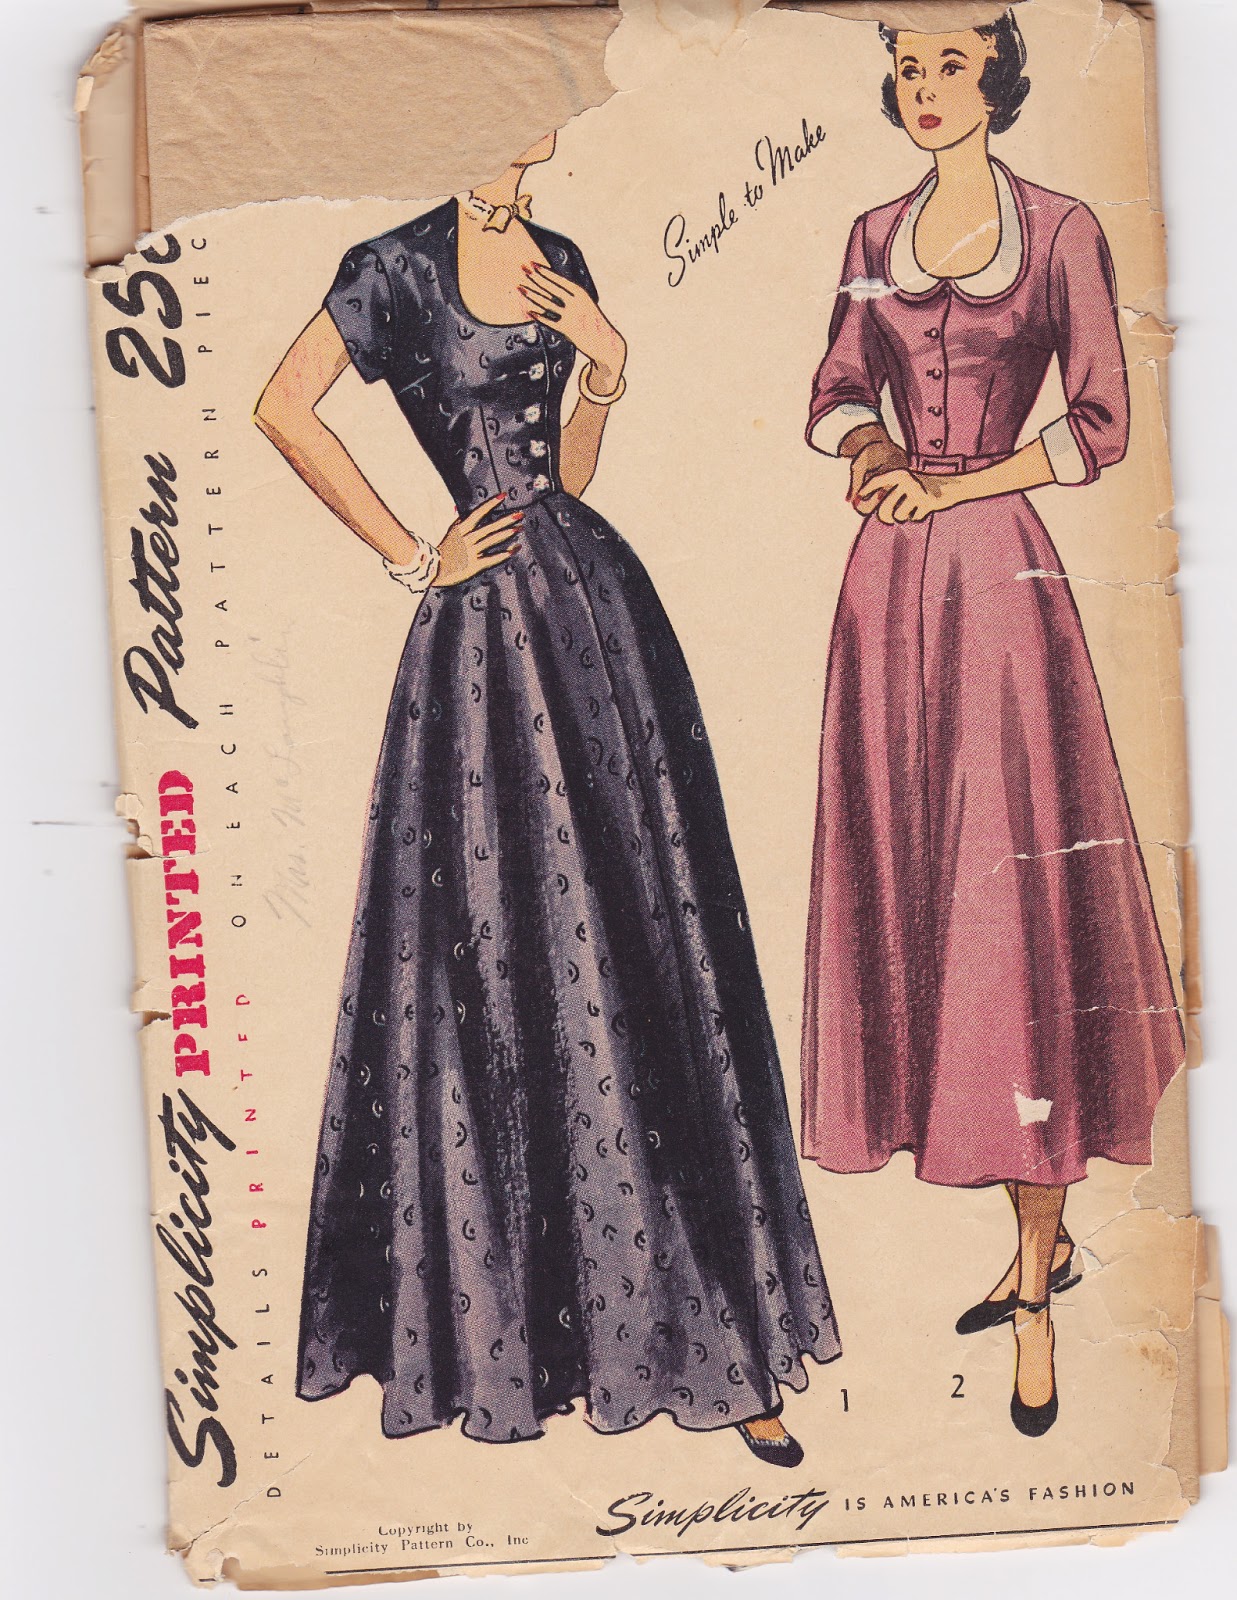
I have some olive print ITY that is perfect for bathing suits in my stash. Have you seen the AMAZING Bombshell Bathing Suit pattern by Closet Case Files? The blue version is so 1950s glam! My jaw hit the floor when I saw it. It's exactly what I've been wanting to make for myself! I bought it right then and there. I also placed an order with Sew Sassy for lining, elastic and poly laminate foam to make my own cups for support (I just can't find any big enough for my girls). Closet Case Files is also hosting a sewalong. I'll be participating.


If the olive suit turns out well I plan to make a leopard one and maybe a gold or copper lamé one.

So, that's what I think I'll be sewing for summer. Right now on the table I have my Gatsby inspired robe to finish. It just needs the sleeves hemmed and a closure added. I want to do the lingerie I planned to go with it (vintage styled knickers and a bralette or cami) but the satin I bought is a nightmare to sew and I'm not sure I'm up for dealing with it right now. Luckily I have a lacy slip that will match the robe already.

Other plans for the summer include hopefully going to the beach for a weekend with all the kiddos (step-kids, too) and I want to teach my almost 9 year old daughter to sew. I want to start with hand stitches with her then get her a very basic machine to learn on after she gets the hand stuff down. I also want to try to fix my serger. I think one of my loopers is bent. I got the serger for free so I don't want to spend anything taking it to a shop. I figure I like to tinker and figure out how things work so I'll try to fix it. It's already not working right so what do I have to lose? lol  My job is going well. In mid-July I will be switching from day shift to night shift. I've never worked nights before, so it should be interesting. Hopefully I can adapt to it ok.

Do you have any sewing or crafty plans for summer? Or maybe winter if you are in the other hemisphere? Leave me a comment and let me know what you plan to make.

Sunday, June 09, 2013

100 Facebook Fans Giveaway Winners!

First, thank you everyone who entered! I appreciate your interest and support so much! I opted to draw based on who was interested in what pattern, in order to make sure everyone had a chance to get what they wanted most. If a person who won the first was interested in both they were immediately removed from the second pattern's list of potential winners. All entries were assigned a number based on the order they were received. Without any further delay let's get to announcing the winners.

The following people were interested in the first pattern (their entry number is in parenthesis) :

Simplicity 2741


Alethia (1, 5)
Kimberly (2, 3, 4)
Ruth (6)
Allison (7)
Rochelle (8)
Jacqueline (9)

And the number drawn was:
 
Congratulations Rochelle New!! 

The following people were interested in the second pattern:

Simplicity 2538
 

Alethia (1, 5)
Kimberly (2, 3, 4)
Beccie (6)
Ruth (7)
Allison (8)
Angela (9, 10, 11)
Pamela (12, 13, 14)

Jacqueline (15)


And the number drawn was:
 
Congratulations  Kimberly Olson!!

Winners, you have 48 hours to contact me by facebook message through the Sew Damned Creative page. If a winner does not contact me in that time I will select a new winner for the unclaimed pattern on Wednesday, June 12, 2013.

Thank you everyone for your participation and congrats again to the winners! Stay tuned to my blog and my facebook page because I plan to host another giveaway (to be announced soon).

Saturday, June 01, 2013

CLOSED: 100 Facebook Fans Giveaway!

If you follow my Facebook page you'll know that I said from the very beginning that once I reached the 100 likes milestone that I would host a vintage pattern giveaway. In the wee hours of this morning my page reached, and surpassed, the 100 likes mark! I'm so excited! To celebrate that I want to offer two readers a vintage dress pattern in thanks for their interest and support.

The first pattern is a 1940's Simplicity pattern, numbered 2741, for a scooped neck shirtwaist dress in either evening/ankle length or tea length with short or 3/4 sleeves and detachable cuffs/collar. It is size 14, bust 32 inches, and is partially cut (very neatly). The envelope is in sad shape, but the pattern is in great condition. No instructions are included (sorry, they are just missing and were when I purchased the pattern) but it is a simple dress to put together from what I can tell.

Simplicity 2741
Pattern 1
The second pattern in this giveaway is another Simplicity pattern, but this one is from 1958, numbered 2538. It is the perfect Marilyn Monroe halter style dress! It is a size 16, bust is 36 inches, and has skirt length variations and an optional cummerbund. The pattern is partially cut and in great shape. The envelope has some tears but is still intact.

Simplicity 2538
Pattern 2
Official giveaway rules:
  1. Giveaway is open internationally.
  2. Must like Sew Damn Creative on Facebook and leave a comment on this post letting me know you have done so.
  3. For an extra entry, tweet this post and comment with a link to your tweet.
  4. For an extra entry, pin this post on Pinterest and comment with a link to your pin.
  5. You can combine your links and like comments into one, but I must have the links for extra entries to give you credit.
  6. Giveaway will be closed on Friday, June 7, 2013 at Midnight EST. 
  7. Winners will be announced by no later than Sunday, June 9, 2013. Announcement will be done via blog post and on the Facebook page.

Saturday, May 25, 2013

Life at 35

It's been around a month since my last post and that was NOT how I had planned things. My husband had to have emergency eye surgery for a detached retina and helping him, along with picking up the slack while he healed, literally took up almost all of my free time for the past 4 weeks. He has been doing everything just like he is supposed to, and it has helped him recover as quickly as possible. I'm so immensely proud of him! I also home school the girls. Oh, and I started my job this week, so free time was certainly at a premium.

Yesterday was my 35th birthday. Normally for my birthday I host a Tiki Party. With everything that's been going on (Hubby's eye and me starting my job) I decided not to do that this year. Instead I opted for going out with Hubby and close friends for dinner and drinks at National Harbor. I made that decision 2 weeks ago. A week ago I decided I would make myself a dress for the occasion. I scoured my stash and found some rayon challis yardage that I had bought probably 15+ years ago for a dress that never got made, some white cotton broadcloth, and McCall's M6277. I also found a zipper that was right for the pattern and I already had thread that matched the rayon perfectly. What?! I can make a nearly free dress?! Yeah, I was all over that!

Here's what I ended up with:
McCall's M6277


I love it! It is so incredibly comfortable! It's lined (except those awesome flutter sleeves) with the cotton. It's a good thing, too! Normally the end of May is around the mid 80's (Fahrenheit) but yesterday might have hit 60 degrees! And it was in the LOW 50's by the time we got to National Harbor. I had to buy a jacket after work yesterday! I got this one on clearance for $19.98 at Target. An XL fit me almost perfectly. Just need to shorten the sleeves a smidgeon.

It was gloomy and cloudy and threatening rain all day and well into the night. What a yuck day, but I still made sure I had a wonderful time in spite of Mother Nature. We had dinner at McCormick & Schmick's (it was delicious and I completely overstuffed myself) and then went to Harrington's Pub & Kitchen for drinks and music. It was a great time and I had simply the best company!

I consider myself a strong intermediate seamstress and decided to follow instructions to the letter on this pattern (I almost never do that). The pattern for the dress is rated as Easy. I'd say that is mostly true. Key word is "mostly," though. The lining instructions are a little wonky, and as I'm not extensively experienced in lining, I got a bit confused. I had to unpick the lining at the start of the process but I was able to figure it out. I think the instructions need better pictures of the armhole attachment of the lining for it to be a truly easy/novice friendly pattern. I also had an issue with the neckline (View C's V-neck) completely stretching out of shape in the rayon. There was nothing noted in the pattern instructions about stay-stitching the neckline for that view and it really should be corrected to add that. Otherwise you end up with what I got... a very strangely gaping neckline if you use rayon challis as suggested on the pattern. I ended up purchasing some gold-tone and purple enameled clip earrings and using them as dress clips to convert the neckline from V to a sweetheart style. Worked great as a fix.

I had to make some adjustments, of course. It's a princess seamed dress so it was super easy to do. I had to narrow the back and shoulders a little. I had to add more to the bust. I cut it at an 18 for the shoulders and bust and tapered to a 20 for the waist and hips. I had to alter the hip curve a bit. It was high on the pattern compared to where my hips curve most. Otherwise the waist and hip were perfect. I liked it having some ease and ended up not inserting the zipper because I could slide it over my head without any problem. The belt/sash cinches it just fine. I also shortened it just about an inch or so. It's a great, comfy, spring and summer dress. I'm so glad I made it! The simply best part of the dress is those sleeves. They flow when I walk and swish when I turn. AMAZING! I will probably make a version without the flutter sleeves as a basic, though, with the zipper and a little more fitted. I'll make sure I stay-stitch that V neckline, though.

I sometimes get asked "Do you feel any older?" on my birthday. You know, I literally felt AWESOME. I really believe I improve with age. I'm proud to be 35. I've earned every fine line and gray hair I'm developing. I've had an amazing life and it just keeps getting better.

Sunday, April 21, 2013

Mad Men Challenge 2 Complete!

Inspiration: Megan's Orange A-line Dress

Phew... I did it! The deadline for the JuliaBobbin's challenge was extended until tomorrow and I got two dresses made with just hours to spare. Best part is the girls love their new dresses!

Simplicity 4927

Both dresses were made with Simplicity 4927. It's a simple A-line dress sized from Girls' 3-8. The shape and neckline really hearkens to the mid-late 1960s Mod fashion.

Simplicity 4927

For Abbie's dress I had to cut a size 4 for the bust/shoulder area, a size 6 for the waist, and a size 5 for the hip. I cut it to a size 6 length. Her dress was made with quilting cotton yardage I purchased from my friend Angie. She runs Sew-lutions on Facebook and two Etsy shops: Fabric4U and Patterns4U. She is offering a discount in both of her shops to my readers. As a Sew Damned Creative reader you are entitled to 10% off of $10 or more purchases (S/H not included) in both of her shops. Use code SDCREADER when you buy from her on Etsy.

Simplicity 4927 

Evie's dress was cut to a size 5 in the bust/shoulder area, a size 7 in the waist, and a size 6 in the hip. I cut it to a size 7 length. Her dress is made with cotton yardage I purchased at Hancock Fabrics last year.

Simplicity 4927

It feels good to get this challenge done. It almost didn't happen. Next up I have to alter a bridesmaid gown into something more prom appropriate for a client before the end of the month. In May I'm going to be making some 1920s inspired lingerie for myself for the Great Gatsby Sewing Challenge.  I'll also be making a 1950s cotton wrap skirt to wear with my bathing suit for the Accessory Inspiration contest at Pattern Review. I'm going to enter that into the natural fiber contest, too, as it will be made in all cotton.


Saturday, April 13, 2013

Not So Mad After All

I took another break from the Joan dress because we had unseasonably hot temps here in Maryland and our AC is out of commission. Bleh. No desire to sew when it's hot inside like that. Well, it finally cooled off today and I came back to the lining that I had been working on fitting. The fit is fine but I'm just not crazy about the dress now. The square neckline is not something I'm really into (not sure why I even thought I would want it) and I'd much prefer a princess seamed dress instead of a darted one. So, I scrapped it. I still have the uncut shantung that I plan to make a cocktail dress from, but I'll revisit that idea closer to autumn.

Am I waving the white flag on the Mad Men 2 Challenge? NEVER! I have a backup plan after a quick search of my pattern and fabric stashes. I found two semi-mod looking floral cotton fabrics in yardage that would work for dresses for my daughters. I also came across this adorable little A line dress pattern:

simplicity 4927
Simplicity 4927
Very workable to look similar to mid-late 60's! And I can totally make two of these in the 6 days I have left. I'm going to have the girls pick out their preferred fabric in the morning. I have enough of both fabrics to make two dresses of each in case the girls want the same fabric.

Changing my mind with 6 days left?! Maybe I am a little mad.


Tuesday, April 02, 2013

I Must Be Mad!

I totally distracted myself last week with making the slip to go with my Sew for Victory dress. That derailment made me feel awesome when it was finished, though, so totally worth it! Now it's time to get back to work on my Joan inspired dress for the Mad Men Challenge #2 (see button on right).
 
Mad Men Season 5 Cast Photo, Joan Green Dress
 
Last week I got a package from Amazon that had these two books in it:
 
Fit For Real People, Gertie's New Book for Better Sewing
 
I really wish I had bought Fit for Real People (FFRP) when I first started sewing in 2010. It would have saved me so many headaches and heartaches over failed fitting attempts. I inhaled the entire book that same evening it arrived and thumbed through Gertie's New Book for Better Sewing. I'm looking forward to trying out the projects and techniques in Gertie's book at some point but I knew I could apply things from FFRP to my Mad Men dress right now! 
 
After doing 4 muslins of McCall's 2401 (View C) I've totally lost my mind and decided to start over. I'm incorporating the techniques in FFRP with the pattern tissue. The changes I had made to the back already were spot on with what they say to do. 
 
McCall's 2401
 
My front, though, oh wow... did I ever have it overly complicated! I changed my wing-it approach to their Y Full Bust Adjustment and now I have a pattern tissue that fits my bust beautifully! It took 20 minutes, not 4 muslins, too!
 
McCall's 2401
 

Sunday, March 31, 2013

Victorious! Sew for Victory Sew Along

I decided a few weeks ago that I would join the Sew for Victory Sew Along hosted by Rochelle at Lucky Lucille (check out the button on the right). It's a 1940's themed sew along and I just love that era. I used a 1948 Simplicity pattern to make my dress. Here it is all finished!

Simplicty 2486

Simplicty 2486

Simplicty 2486

I also needed a slip under the dress because the fabric was semi-sheer. My only (modern) full slip was way too short so I ended up making one from a 1940's Advance pattern. Here it is:

Advance 6333

Advance 6333

Advance 6333

My inspiration:  
Wedding Day 1938 Aaron Nester Wavie Nester
My paternal grandparents on their wedding day. June, 1938
My paternal grandmother, a woman who I often considered to be a mother more than a grandmother, was one that would never waste anything. She was born in 1920 and remembered the Great Depression. She spent her days in the 1940s keeping up a farmhouse and raising 4 of her 5 kids (the 5th came in the next decade). One of those 4 children was my father, who was born in 1946, so he was one of the first of the Baby Boom generation. I can imagine her wearing comfortable, simple, but kind of pretty house dresses. She'd have her wedding ring on and pretty much no other jewelry. Baubles were reserved for when she left the house. She'd have on her perfume but not have makeup on in the house. If she was going shopping she would never leave without her lipstick on. That's pretty much all she ever wore. She never fussed with all that other stuff. She'd use her Oil of Olay moisturizer and maybe a little blush, but she'd wear vibrant lip color. Usually some sort of coral or red. She was a natural beauty and really didn't need a lot of makeup to look stunning. During that time she had very dark hair, nearly black, and crystal blue eyes.

A little tidbit:
Grandma's baby brother died in WWII. He was an Army Private that was in the group who stormed Normandy Beach. He barely made it to land before he was hit and killed by the Germans. Grandma had his Army picture hanging in her living room and when I was a little girl I asked her when Daddy had been in the Army. My dad looked a lot like her baby brother. She told me who it was in the picture and his story. I hope I never forget that memory.

Sunday, March 24, 2013

Advance 6333 Throwing Darts at Gathers

So, after a really good sleep I came back to my progress on Advance 6333 and realized that I was just not loving the cup of the bodice. I am very busty and my bust is fullest at the bottom. Adding lots of gathered fabric where my bust is fullest really wasn't looking good. I decided to pinch out those gathers into darts. I added a side dart and three under bust darts.

Advance 6333
With Darts
Advance 6333
With Gathers
Advance 6333
With Darts
Look at that profile! Hotness!!


Advance 6333
With Gathers
Looks so much better on me! Heck, it looks much better on Mathilda, too!  Making this sort of design change really affects the finished slip. It is going to be much more fitted now, so I'll need to add a zipper to the side to get in and out of it. I'll need to redraw the cup to incorporate my changes and to give more length to the bottom side to compensate for the dart. Also, I have decided to use bias binding instead of self fabric like the pattern calls for. Just easier that way and I want to add a little contrast. If I have enough of my binding left over I'll just use it for my straps. If not I'll just use the sky blue cotton.

I also got the back worked on today and had to make a slight adjustment to the top because I have narrow shoulders. I also need to move the attachment point for the straps over about 1/2 inch towards the center. The back really did almost fit perfectly right from the pattern.

I cut out the skirt pieces and have basted together the back of the skirt. I'm sure I'll need to add probably 2 inches to the back and maybe more for the front. I hope to have the entire bodice finished tomorrow and then get started on skirt fitting.


Sidetracked Sewing

After making 4 muslins to work out the fit on my Mad Men dress (yes, 4!!) I really needed to just step away from that project. I'm still not totally happy with the fit and I'm going to start from scratch with tissue fitting. I've recently gotten the book Fit for Real People and I now have a sewing bible! I'm going to incorporate the techniques from that book in my restart. In the meantime I've been impatiently waiting for a sunny day that doesn't feel like winter to photograph my Sew for Victory dress outside. So far one of those hasn't really happened. I realized when I completed the dress that I really need to wear a full slip with it as it is made of slightly sheer fabric. I came across this pattern on eBay and I won it. It's perfect for the dress!

Advance 6333

It's in mint condition! I got it for $12. I feel like I got a great deal! I'm making it in a sky blue cotton poplin that has 2% spandex for a little stretch. I got like 10 yards of it on sale a couple years ago and I use it as muslin for slightly stretchy projects.
 
I'm really not the size of the pattern, so I'm going to be making some adjustments. So far I have almost finished the bust. I ended up cutting the piece as is, then cut it into quarters and spread it over me. I filled in the gaps with scraps of the fabric and then cut a new, re-sized piece. I'm so proud of myself for not sticking my breast with a pin when I was doing that! I need to add about a half inch of length from the side seam tapered to the center of the bust. Here's Mathilda modeling what I've done so far:

Advance 6333 FBA

When I finish the bust I'll be tweaking the back just a bit. It almost fits perfectly as is. I think it will need a little shifting of the center, so it will need to be a little narrower. I hope to get the fit worked out of the entire slip later today.  The skirt is all princess seamed panels. Super easy to fix! It will be an easy sew once the fit is taken care of. Crossing fingers that I can get it done and the Victory dress photographed this week. The deadline for that sew along is April 1, 2013. I'm technically done, but I want a modeled photo for the deadline.

So, that's how I'm distracting myself from the little mess the Mad Men dress is.

Thursday, March 21, 2013

Something's Fishy Here

I'm a day late with my food post, so I'm going to make it up to you with offering two recipes today.

I've been craving salmon for a couple weeks, but since I was sick those weeks I had no energy to really cook much. I'm finally 100% back to normal, normal for me that is, and I'm back to cooking. I decided tonight would be fish night. I had some frozen wild salmon on hand and lots of fresh veggies so I came up with a glaze for the salmon and whipped up a salad. Here's what it looked like all done:

paleo salmon, paleo salad 

The glaze is a mixture of butter, Dijon mustard, honey and dill weed. The salad is a basic spinach salad drizzled with an Italian vinaigrette. It was delicious!

If you would like to make it yourself, here's the recipes for the salmon and the salad.

Sunday, March 17, 2013

Mad Men Challenge 2 - I'm In!

I've been bit by the sew along bug in the best sort of way. I've just finished a 1940s style dress for the Sew for Victory sew along (post to come as soon as there is a sunny day for photos). Now that is out of the way I'm on to my dress for the Mad Men Challenge 2 hosted by Julia Bobbin. I hated that I missed out on the first one. I was thrilled that she decided to do it again!  For my dress I'm going to recreate this amazing number that Joan (Christina Hendricks) is modelling in this Season 5 cast photo:

Mad Men Season 5 Cast Photo
Image belongs to AMC.
The actual dress she is wearing is emerald green and it looks like a jacquard fabric.I hunted and hunted at my local Hancock's but couldn't find an emerald or even an olive green fabric that I felt would justify a cocktail dress. However, I did come across some really pretty chocolate poly shantung.

poly shantung cotton broadcloth

I wish it were silk, but my local store had no silk at all. I was not impressed. Next time I'll go to JoAnn's that's further down the road. I picked a cotton broadcloth in orange for lining. I prefer to have natural fibers against my skin.

I'm using McCall's 2401, View C with longer (3/4 length) sleeves. I got it on sale for $0.99 when I got my fabric.

McCall's 2401 
I cut it to a sort of size 18 but I've had to alter it to death to fit me. It has 3 pattern pieces since I'm not using the facings the pattern comes with due to lining it and I've had to make adjustments for being shortwaisted, and having a very full bust, narrow shoulders, and a swayback.  I have to say, though, that the neckline is laying perfectly on me. I'm so happy about that. I tend to shy away from square necks because they gap with my narrow shoulders and full bust. I'm working on my 3rd muslin now, but here's the second one on Mathilda:

McCall's 2401 

It looks a whole lot better on me than it does on Mathilda. She's too rigid to really pull off a wiggle dress. I'm hoping to be done with tweaking after the 3rd one, but I might need a 4th for fine tuning. Then I'll have to work on the sleeves. Luckily I have just over a month before the deadline. It's going to be, hopefully, an amazing cocktail dress when I'm done. I want the fit to be impeccable.

I'm loving the process of working out my fitting issues with this pattern. I think it will be a TNT by the time I'm done. Are you doing this challenge? Leave me a comment with a link to your posts about it.

Julia Bobbin, Mad Men Dress Challenge 2

Saturday, March 16, 2013

Missing in Action and How to Track Me

I apologize for not posting in a week. I spent the past two weeks sick. First I had a cold and a sinus infection sneaked in right at the tail end of it. Had to cancel the pot luck last weekend because I had a fever of 102 and ended up going to Patient First. The antibiotics are doing their job really well and I'm feeling almost completely normal now. Nothing beats better living through chemistry sometimes.

I also found out this week that Google's blog reader service is going away this summer. Bah! Just when I got one follower! What a shame. I do have my blog over at bloglovin. I really do love that service for keeping up with blogs I follow. I'd be honored if you'd go follow me there. You can do so by clicking this link. Also, the b♥ icon over on the right of the page links to my blog at bloglovin.

I'll be back tomorrow with a sewing post. And probably on Monday with a St. Patty's Day craft post. The kids and I made really cute stuff for tomorrow in homeschool this week.

Thursday, March 07, 2013

Correcting False Starts

This is a slightly personal (and long) post. I won't be doing these often but I wanted to actually share something I had sewn that I wore today for a special reason. I had a meeting (kind of an informal interview) for a job today! I wore a skirt I had drafted a pattern for myself:


Outfit Details: Top - Talbots, Skirt - Made by Me, Shoes - Dansko Harlow, Tights/Belt/Scarf/Earrings - Target
On top of being a domestic goddess I am also a registered nurse. I am a kind of new nurse, too. How I became a nurse is one heck of a story. I had wanted to be a nurse since I was 3 years old. See:


Yep, that's me on my 3rd birthday taking good care of my doll. Three years later I ended up being hospitalized overnight for croup. Basically it's a respiratory issue that creates a barking cough due to swelling around the vocal chords. It caused me to cough so much I could barely breathe. Scary stuff for a little kid. The nurse that took care of me that night was one of the kindest, friendliest people I have ever met in my life. She made me feel less afraid of what was going on with me. I knew for sure, then and there, that I wanted to be able to do that for others when I grew up. Over the years I sometimes thought maybe I would rather be a doctor, but I kept coming back to nursing.

After high school I started nursing school but ended up dropping out. False start #1. Due to personal reasons I was not ready for college right out of high school. I worked for a year, moved, and went back to school for business to get myself from waiting tables into secretarial work. I temped for years and ended up in a great engineering firm. I'd pretty much given up on becoming a nurse by then. As luck would have it I became a mom and after I was home with my babies for a couple years I had the opportunity to go back to college. I jumped on it! Thirty years after the picture above I actually became a nurse!


That's me hugging my mom at my college graduation and we are both crying tears of joy. It had been a LONG time coming! Well, graduating was just the first hurdle to being what I am today. I also had to pass a license exam called the NCLEX. I was so nervous the first time that I failed. Yep. I failed it. Just barely. Literally if I had gotten one or two more questions right I would have passed and I had maxed out the number of questions on the exam. Just barely failing really sucked. I kicked myself for being so scared because I knew that is what made me fail. I threw myself a pity party for a few months while I waited to be able to take it again. When I took it again I only got the minimum number of questions and I passed it with flying colors. So 6 months after graduation I was finally a licensed registered nurse! Then I had to go about getting a job...

Wednesday, March 06, 2013

Recipe: Corn Pudding

This coming Saturday I'll be hosting a potluck. Cooking for a crowd is something I love to do. I will be covering the entrees for this event, however, when I'm going somewhere else and have to bring food one of my family recipes is often requested. That recipe is my family's version of corn pudding. The recipe is one my mother made when I was a child, and she still does for social functions. This is a custard style corn pudding, and it is really sweet. It's not meant to be healthy. It's meant to be jaw-dropping delicious.  It is deceptively simple to make. I hope you will give it a try and that you enjoy it.

Note: This recipe is easily halved to make a more reasonable family dinner size in case you are not cooking for a huge crowd.

This photo is of a half batch prepared.
Corn Pudding
8-12 Servings

Ingredients:
  • ½ cup butter (margarine will affect this dish's consistency, please use the real thing)
  • 1 cup sugar
  • 2 cans (14.5 oz.) cream style corn (I prefer Del Monte Brand)
  • 2 cans (12 oz.) evaporated milk
  • Enough water to make 4 cups of milk
  • 6 Tablespoons Cornstarch
  • 4 eggs
  • 2 Teaspoons Vanilla (You can use imitation if you do not have pure vanilla.)
Directions:
  1. Preheat oven to 400 degrees.
  2. Place stick of butter in a 9”x13” baking dish and melt in preheated oven.
  3. Mix evaporated milk, water and corn starch until the cornstarch is dissolved.
  4. Mix all other ingredients together in a bowl.
  5. Add milk mixture to bowl and blend well.
  6. Pour mixture into melted butter in baking dish.
  7. Bake for 40 minutes.

    Printable Recipe

Sunday, March 03, 2013

Welcoming Spring: Craft 2-fer (Part 2)

In my fervor to decorate for spring I wanted to make a wreath for the door that would work with the oval glass inset's proportions. Here is what I came up with.

spring wreath

I took a grapevine wreath that I got at a thrift store for $2 I think, and wrapped it in sheer green ribbon purchased at Dollar Tree for $1. I didn't glue the ribbon as I wanted the option to easily remove it if I wanted, so I just tied it to secure it once it was wrapped around the wreath. I then took Dollar Tree flowers and put them in by wedging them into the wreath, under the ribbon. They are nice and secure and totally removable so I can customize it anytime. The flowers probably cost me $3 total for the three colors. I had some vintage (or possibly antique) lace that I wove around the wreath. It was just long enough to wrap as you see and I tucked the ends in behind the peach flowers. The lace was a remnant from a top I made a few years ago. Grand total for this wreath is $6! It's so cheerful and perfect for spring. Oh, the hanger I got at Dollar Tree, too, for $1 around Christmas.

Here's how it looks from outside:

spring wreath


And how it looks when people come up to the door: 

spring wreath

I actually had all of these supplies on hand because I made my first spring wreath with them last year. Here is that one:

spring wreath


At the time we were living in another home and it had a very boring and very white front door. It was begging for a ridiculous amount of color.

I need to make another wreath for our other entrance that gets used a lot. With any luck I can get to that soon.

I hope you enjoyed the Spring Decor 2-fer!

Welcoming Spring: Craft 2-Fer (Part 1)

In meteorological terms, February 28th was the last day of winter, according to my local news. I was hit with a little spring fever that day, appropriately enough it seems. I took down all the winter decorations and started putting out the spring items. I set out one of my favorite DIY decor items, these lovely hurricanes:


I made them 2 years ago and I've used them every spring since. My inspiration to make them was a tutorial at Decor Chick.

Here's what I used for all 3. All purchased items were bought at Dollar Tree 2 years ago.

Vases - $3
Candlesticks - $3
Gorilla Glue - $0 - had this on hand
Mini River Rocks - $1
Jumbo River Rocks - $1
Faux Moss Covered Rocks - $2 (used 3 per hurricane)
Artificial Baby's Breath - $1
Ivory Satin Ribbon -$0 - had this on hand
Total for 3: $11

These look like something from a housewares store that would sell for a LOT more. They are so pretty! If you try these out for yourself please let me know. I'd love to hear how they turned out for you.

Wednesday, February 27, 2013

Recipe Review: Slow-Cooked Pork Roast

Yesterday morning I wanted something easy to fix for dinner that would use whatever I had on hand. It's almost grocery day so it's getting slim around here. I looked in the freezer and saw I had a 2 pound boneless pork loin blade roast. I decided I would use that and went about finding some recipe that would let me mix it with the things in the pantry and fridge. After a Google search I came across Paleo Diet Lifestyle's Slow-Cooked Pork Roast. After a quick scan of the ingredients I knew I could make it work.

I went about thawing the roast and prepping the ingredients. I ran into some snags and had to adjust. Here's what I changed:
  • I didn't have any fresh garlic, so I had to sub garlic powder. 
  • I didn't have any ground coriander and subbed an equal amount of ground cumin (which actually doubled the cumin in the recipe). 
  • I didn't have any cider vinegar on hand so I subbed with a mix of white wine vinegar and pure apple juice (3 parts vinegar/1 part juice). 
  • I didn't have any stock on hand so I used water as the recipe suggested.
  • I didn't have any canned tomatoes, so I peeled* 4 Tesoro tomatoes and crushed them by hand when the recipe called for it. I added 1/4 cup of water with the tomatoes to make up for the lacking juice that comes in the canned versions. 
  • My roast was smaller than the recipe stated so I cooked it for 7 hours instead of 8.
The result:

It's definitely a RAVE!

It turned out absolutely delicious! It was tender, perfectly done, juicy, and flavorful.  The entire family enjoyed it. Even my "Eww... it's meat. I don't want to eat it!" little girls ate it well and gave no complaints, which is saying a lot. This is a recipe that will stay in rotation in my menus. Next time I will try it to the letter to see if it changes much.

*Technique Tidbit - Peeling tomatoes is super simple when you do it right.

Bring a pot of water (enough to just cover the tomatoes) to a roiling boil. While the water is heating score the bottom with a knife in a X, or cross, pattern. Prepare a bowl of ice water and set aside. Put the tomatoes, one at a time, into the pot of boiling water. Leave in pot for 20 seconds. DO NOT LET THEM BOIL LONGER THAN THIS! Remove the tomatoes and immediately place in the bowl of ice water. Let them rest, covered in ice water, until they cool. Score the skin with your knife around the equator of each tomato. Peel. The top and bottom half ends will peel in one piece!

I hope you enjoyed this review and technique information. I will be back on Sunday with a craft post. See you then!

Sunday, February 24, 2013

Sew Disorganized!


Oh my goodness... I can't believe I'm going to do this, but here is what a mess my sewing space was:


The boxes are from when we moved in back in July. They never got unpacked, just rifled through. Piles of stuff are because I haven't worked out storage of scraps and such yet. Ridiculous, right?! Well, for the past few days I've been brainstorming, planning and trying to motivate myself to get this mess under control.

I have to take baby steps to get anything done, otherwise I get deer in the headlights stunned by the overwhelming job ahead of me and freeze. I basically procrastinate and do nothing. So, on Wednesday night I gathered my equipment, which was 2 laundry baskets (I should have brought 4) and a trash bag (I should have brought 2), and went to work. 

My first step in tackling this mess was to take care of the first thing in my way. The HUGE box on the left. Well, it took me an hour and 40 minutes, but I got it emptied and basically sorted based on keep and toss criteria. I called it a night after taking care of that HUGE box. I felt a great sense of triumph. It had been a thorn in my side since BEFORE we moved in July. Yep. It's been full of stuff for probably a year. I'll do my walk of shame for that when I'm not too busy reveling in beating that sucker.

Over the next three days I really got down to business with this mess. I finished sorting the rest based on keep/toss criteria and then I sorted the keep stuff into fabric, patterns, and other. The fabric yardage and scraps are mostly put away, patterns are in boxes waiting to be put in their permanent homes, and the other stuff is all put away in bins that I need to label. My big accomplishment from this: I can get to my machine again! Yay! See for yourself:


I am so proud of myself! I was overwhelmed by the space and all my stuff for a long, long time. It feels so good to get that handled.

Now that I can actually do some sewing in the space again I have some goals to accomplish:
  1. Finish the dress I was commissioned to make. (Top priority)
  2. Get new shelves and put my fabric on them in some semblance of order.
  3. Organize my patterns.
  4. Sew some AG things for the girls to use up scraps.
  5. Schedule regular mending time.
  6. Assess the basket of WIPs under my sewing table to see what needs to be finished and what needs to be scrapped.
  7. Sew some awesome clothes for my family and me.
Those goals will probably be a general outline of upcoming sewing posts. In two weeks I should have something sewn to show off and discuss. I'll see you again this Wednesday with a recipe review post and next Sunday I'll have a craft to show you. For now I'm going to enjoy a glass of wine in celebration of taking this step towards getting my sewing area as good as it can get.