Showing posts with label Home Decor. Show all posts

Sunday, March 03, 2013

Welcoming Spring: Craft 2-fer (Part 2)

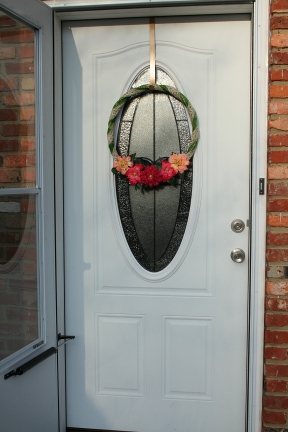
In my fervor to decorate for spring I wanted to make a wreath for the door that would work with the oval glass inset's proportions. Here is what I came up with.

spring wreath

I took a grapevine wreath that I got at a thrift store for $2 I think, and wrapped it in sheer green ribbon purchased at Dollar Tree for $1. I didn't glue the ribbon as I wanted the option to easily remove it if I wanted, so I just tied it to secure it once it was wrapped around the wreath. I then took Dollar Tree flowers and put them in by wedging them into the wreath, under the ribbon. They are nice and secure and totally removable so I can customize it anytime. The flowers probably cost me $3 total for the three colors. I had some vintage (or possibly antique) lace that I wove around the wreath. It was just long enough to wrap as you see and I tucked the ends in behind the peach flowers. The lace was a remnant from a top I made a few years ago. Grand total for this wreath is $6! It's so cheerful and perfect for spring. Oh, the hanger I got at Dollar Tree, too, for $1 around Christmas.

Here's how it looks from outside:
spring wreath


And how it looks when people come up to the door: 

spring wreath

I actually had all of these supplies on hand because I made my first spring wreath with them last year. Here is that one:
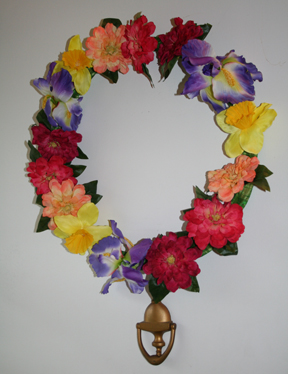
spring wreath


At the time we were living in another home and it had a very boring and very white front door. It was begging for a ridiculous amount of color.

I need to make another wreath for our other entrance that gets used a lot. With any luck I can get to that soon.

I hope you enjoyed the Spring Decor 2-fer!

Welcoming Spring: Craft 2-Fer (Part 1)

In meteorological terms, February 28th was the last day of winter, according to my local news. I was hit with a little spring fever that day, appropriately enough it seems. I took down all the winter decorations and started putting out the spring items. I set out one of my favorite DIY decor items, these lovely hurricanes:


I made them 2 years ago and I've used them every spring since. My inspiration to make them was a tutorial at Decor Chick.

Here's what I used for all 3. All purchased items were bought at Dollar Tree 2 years ago.

Vases - $3
Candlesticks - $3
Gorilla Glue - $0 - had this on hand
Mini River Rocks - $1
Jumbo River Rocks - $1
Faux Moss Covered Rocks - $2 (used 3 per hurricane)
Artificial Baby's Breath - $1
Ivory Satin Ribbon -$0 - had this on hand
Total for 3: $11

These look like something from a housewares store that would sell for a LOT more. They are so pretty! If you try these out for yourself please let me know. I'd love to hear how they turned out for you.

Sunday, February 17, 2013

Paper Roses: They Live Forever!


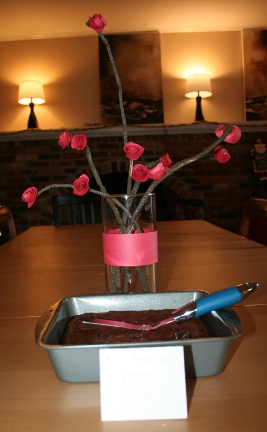
This Valentine's Day, after breakfast, Evie (my 8 year old) wanted to make something. She asked if we could make flowers because we all could enjoy them. I thought it was a brilliant idea! I told her we could do that and went about looking for inspiration online for making paper flowers. I came across this tutorial and It hit me that method would be perfect for the supplies we have on hand. It also would be really great fine motor practice, which my 7 year old, Abbie, needs.

Here's what we used: 

  • 1 sheet of 12 inch x 17 inch red construction paper
  • 1 cylindrical glass vase 
  • 6 twigs collected from our yard 
  • Elmer's school glue
  • ruler
  • scissors
  • pencil

Here's how we did it:

1.     I drew 12 4-inch by 4-inch squares on the red construction paper.

2.     I drew a spiral on each square. Abbie said they looked like snail shells.


3.     I cut each square out and divided them amongst the three of us.

4.     We cut along the small line of the spiral first.

5.     Then we cut along the spiral all the way to the center.


6.     We tightly rolled our spiral from the outside to the center.


7.     We put a big drop of glue on the center, let the rolled portion go so it would unwind a bit, then pressed the rolled part to the glue and held for a few moments.


8.     We set them on the table to dry. While drying we made some brownies for Daddy. They are his favorite.

Abbie (L) and Evie (R) making Daddy's favorite dessert.

9.     While the brownies baked we put big drops of glue on the twigs and pressed the roses to the glue for a bit.

10. We let the roses dry on the twigs for about 20 minutes.


11.  I wrapped the remaining construction paper (a 12-inch by 3-inch strip) around the cylindrical vase and glued the ends together while the roses/twigs were drying.

12.  I arranged the roses in the vase. Tada! 

We set it up on the table with the brownies and a note for Daddy signed by all three of us. He was very happy with his gift when he got home from work

Sadly the flash washed out the note. It said 'We love you! Relynn, Evie, Abbie"

While having dinner that night we were talking about the roses. Both girls were incredibly proud that they helped make them. Abbie told Daddy "They are paper roses and will live forever!" Daddy asked, "But what if I set them on fire?" I immediately responded, "Then they will be Fire Roses, which is the title of one of my favorite poems. So they will still be awesome!" We all had a good chuckle.

In case you're curious, here's that poem:
 

Fire Roses

Today you grasped
the stars as
they were slipping off
the edge of my horizon
and shook them back
into the sky. 

You are
quicksilver
can leave me
slow-footed
wordless.

My skin is alive
with the soft imprint
of your mouth.
How many miracles
can there be?

As I burnt your letters
the pages spread and curled
bloomed
like fire roses.

— Cynthia Fuller

Tuesday, September 27, 2011

Vintage Clock Coasters

Old CDs, printed clock faces, sliced wine corks and lots of mod podge and I came up with these:

 CD Clock Coasters

CD Clock Coasters

I was inspired (and got a couple of the clock images) from a posting on Pinterest. Love how these turned out!